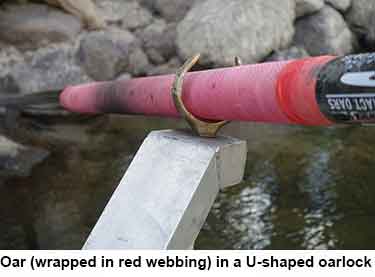
Oars used in U-shape oar locks need to be protected by wrapping the oars with cord or webbing. I prefer webbing since it's not as time consuming as cord - and it looks nice.
Here's a few notes on how I do it.
Materials needed: oars (wood or synthetic), flat webbing (approximately 10 feet or more per oar), and all purpose contact cement.
Step 1. First, temporarily wrap the oars to figure out how much webbing you'll need. Don't use any contact cement yet. Use tape to hold one end of the webbing in place and then wrap the oars until you have the area in the oarlock covered well.
Step 2. When the position of the webbing and length of the area covered by the wrapping looks good to you, use a pencil to mark the oar where the webbing starts and where it ends. Cut the webbing and unwrap.
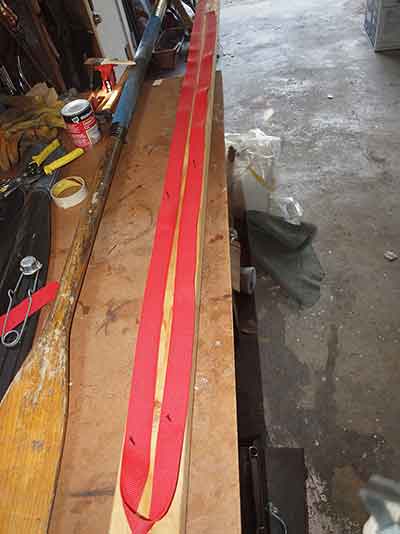
Step 3. Lay the webbing out. I like to lay it out on a board and lightly tack it here and there with nails (see photo to right).
When the webbing tacked out like this, it's easier to apply the contact cement and it won't end up twisting around and sticking to itself.
Step 4. While the webbing is laid out, apply contact cement to the webbing. Then apply it to the oar itself between your marks. Wait until the cement is tacky.
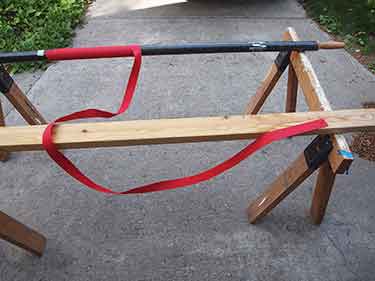
Step 5. For the actual wrapping I'll suspend the oar between two saw horses and drape it over a 2 x 4 to keep the webbing from falling on the ground (see photo to right).
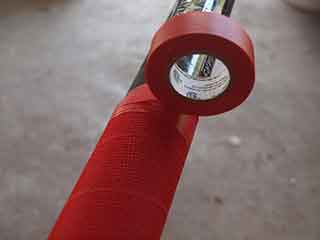
Step 6. Finish things off by taping the the ends of the webbing with plastic tape.
Done! Ready for water.
[END]