
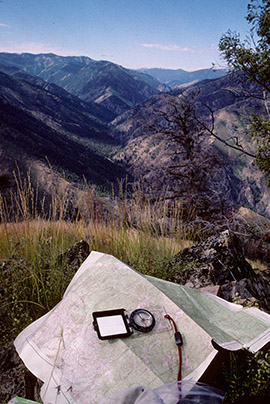
Background on Aspects of Using a Compass
By Ron Watters, Professor Emeritus of Outdoor Education, Idaho State University
On this page you'll find some background information on the use of compass. If you haven't already, you'll want to start on the introductory page found here: Compass Technique.
(Or, if you'd rather pick from a list of topics, you'll find it here: Topic Index.)
Topics Covered in This Page
This page covers three topics:
2. Taking a map bearing when two points are very close together.
3. How to sight a landmark on compass with a mirror.
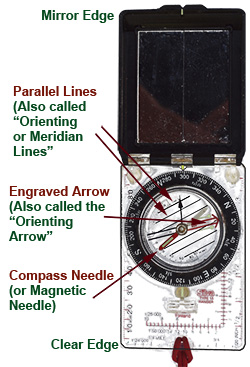
The parallel lines on the compass dial are very useful when taking a map bearing - or when applying a field bearing to the map. In either case, you try to get the parallel lines as vertical as possible. Getting the parallel lines vertical is a key part of the process and we'll look at that in more detail here. But first let's review each of the techniques:
Map Bearing. On a map bearing you have two points: a starting point ("from") and a destination point ("to"). You place the compass on the map so that edge of the compass is aligned with both points. Make sure that your mirror (or "direction of travel arrow" is pointed toward to the destination point. Then, you turn the compass dial so that "N" (North) goes to the top and parallel lines are as vertical as you can make them. More details.
Field to Map (You know where you are). If you are applying a field bearing to the map and you know where you, you place the clear edge of the compass on your location. Then, you rotate the compass. (You don't turn the compass dial but rather you rotate the entire compass.) You continue rotating the entire compass, keeping the clear edge on your location, and bringing "N" (North) to the top. Check to to make sure the parallel lines are vertical. More details.
Field to Map (You don't know where you are). If you are applying a field bearing to the map and you don't know where you, you place the mirror edge of the compass on the distant feature that you can identify. Then, you rotate the compass. (Again, here, you don't turn the compass dial but rather you rotate the entire compass.) You continue rotating the entire compass, keeping the mirror edge on the distant feature, and bringing "N" (North) to the top. As always, check to make sure the parallel lines are vertical. More details.
Note that when using the compass on the map, you don't worry about the compass needle. The compass needle, of course, is used when taking field bearings, but not when working on the map. The only exception is when you have specifically "oriented the map." In other words, you've positioned map so that the top of the map is aligned with with true north. In that case, when using a compass on the map, the compass needle will line up with the engraved arrow. But be careful of this technique. An oriented map in the field is easily bumped and moved. Even if you are sure that the map is oriented, you should always check to make sure the parallel lines are vertical.
Even though the techniques described above vary slightly, the last step for each is the same. You want "N" on the compass dial to be at the top and the parallel lines vertical.
Always double check to make sure that you have "N" at the top and not "S." That's a very common mistake and you want to make it an automatic part of your procedure to always re-check it.
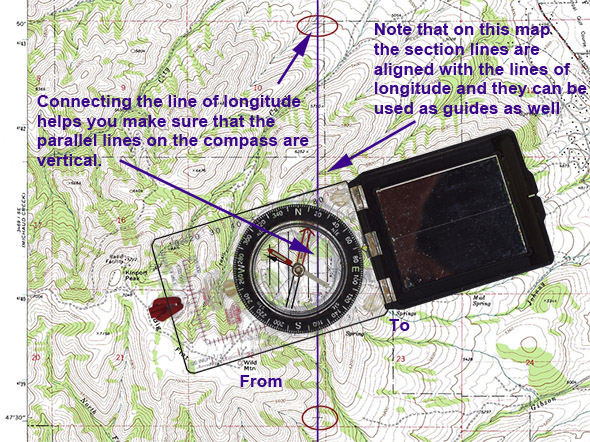
Let's look at the parallel lines. They need to be vertical. Vertical means that they are aligned with the lines of longitude that form the left and right edges of the map. If you are working near the edges of the map, that's not too difficult. In many cases, it's just a matter of moving the compass so that you can look through the compass and see the parallel lines aligned with the map's edge (as shown below):
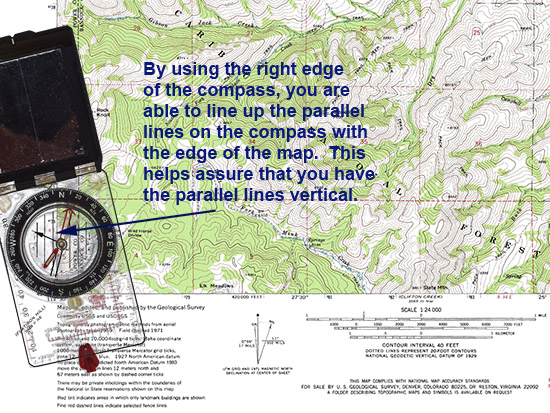
It becomes more difficult, of course, if you are working in the middle of the map. In that case, look for possible guidelines. Sometimes, but not always, section lines will be parallel to the sides of the map. If so, you can use them. That's not always the case, however, and you should examine them carefully before using them as a guide.
The best guide to work with in the middle of the map is to draw lines which connect the lines of longitude. On a 7.5 minute map, you'll have two additional longitude reference points on the top and bottom of the map. You'll also find additional latitude-longitude reference points within the map itself. The edge of a compass with the mirror extended will almost reach between reference points.
When you've drawn in a longitude line, you have the perfect guideline to help you keep the parallel lines vertical (shown below):
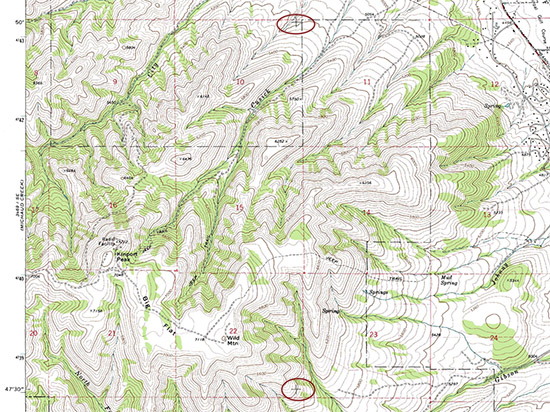
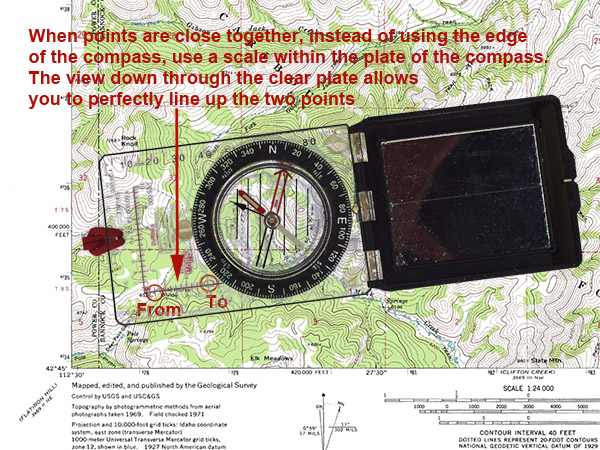
Map Bearing When Two Points Are Close Together
There's a trick that you can use when taking a map bearing between two points that are close together. (More details on Map Bearings.) Instead of using the edge of your compass, use one of the scales that is parallel to the edge of the plate of the compass. This allows you to look down through clear plate and perfectly line up the two points:
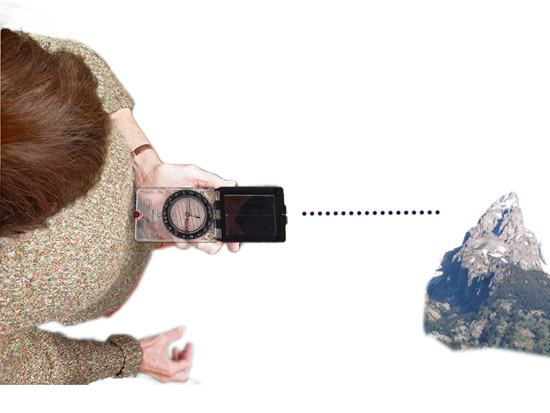
There are two ways to sight landmarks on a compass with a mirror.
1. With the Mirror Extended.
This is the same technique that you would use if sighting with a regular plate compass with no mirror. Position the mirror so that it is extended. The compass is held level near your belly button. Make sure that your shoulders are squared and that your body faces the direction of the mirror. To sight, look down at the line of the mirror.
Comments: I prefer this technique because it quicker for me, and it's easy to hold the compass flat when it's held close to your belly. Keeping it flat is important. The compass must be flat for the compass needle rotate freely. If the compass is not quite horizontal, the reading will be off. By using this method, I'm assured of accurate readings.
2. The Mirror is Placed at an Angle.
Hold the compass at eye level and position the mirror so that opens to an angle of 50º—70º. You'll see the compass dial reflected in the mirror as shown below. While looking at the mirror, position your sighting eye so that you see the sighting line on the mirror intersect the white points at above and below the compass dial. Still looking in the mirror, turn the compass dial so that that the compass needle is lined up in the engraved arrow. Double check to make sure compass is perfectly flat so the compass needle can pivot freely.
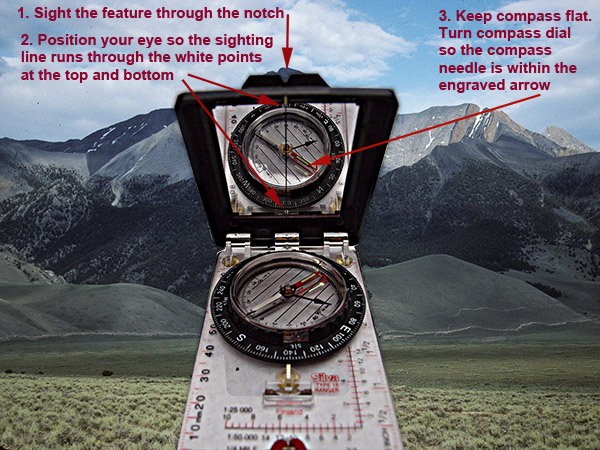
Comments: This method is preferred by many orienteers because they can be assured that the compass is perfectly aligned with the landmark. The notch on top of the compass, as shown above, allows you to do that. The process is more involved than that of the first method since you need to line up the white dots and then turn the compass dial while keeping the compass at eye level. I find the process slower and more difficult to keep the compass flat, but advocates of this system say that with practice, it is reasonably quick and accurate.
[END]